As an internal penetration tester, one of the most important aspects of the job is to be able to set up testing infrastructure for remote penetration tests without requiring too much effort from your clients or local IT department. There seem to be thousands of approaches and an unlimited amount of blog posts online talking about different ways to achieve this objective. The one that seemed the most useful to me was using a public VPN server to connect my workstation with a so-called “dropbox” in the target’s internal network.
After deploying and testing the setup with a virtual machine, I decided to also configure a Raspberry Pi in the same way. The advantage of a Raspberry Pi compared to a virtual machine is that it can be used during physical red team engagements and dropped of at the location in order to get internal network access.
This blog post explains how to set up red team or penetration testing infrastructure with a Raspberry Pi and OpenVPN. Furthermore, it shows how to bypass restrictive firewalls and deep packet inspection, as well as how to have the dropbox send check-in requests to a webserver.
Requirements
The infrastructure should check the following boxes:
- Small, portable and concealable for red team engagements
- Fully automatic, without a lot of on-site effort
- Able to withstand restrictive firewalls
- Fully tested and stable
- Secure by design
The Idea
My approach to this project involves a public droplet hosted on DigitalOcean which acts as the OpenVPN server for the attacker machine and the attacker dropbox. The dropbox is a Raspberry Pi with the Kali Linux OS. For internal penetration tests, where stealth is not a requirement, a simple laptop with a virtual machine does the trick here as well. Both of these devices connect to the VPN server, allowing them to communicate and reach each other via SSH. The OpenVPN traffic is encapsulated within a TLS tunnel using stunnel. Port 443 is used for the connection to the VPN server, as this port is usually allowed in outbound firewall rules. Due to the encryption, packet inspection firewalls are not able to inspect and block the traffic.

The Server
Setting up the server
For the central VPN server instance, we use the cheapest, most basic ubuntu server that DigitalOcean has to offer, since that is enough for our purpose. The instance shown below will cost around 4€ a month, which is an expendable amount for the provided functionality.
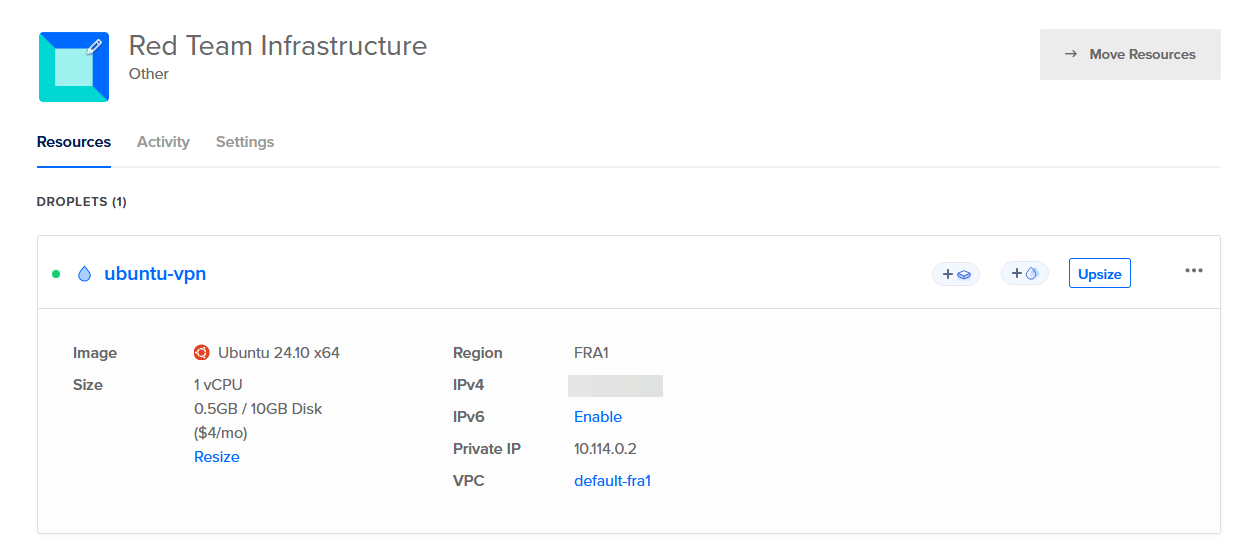
We connect to the server via SSH or the DigitalOcean Console and start configuring stunnel and OpenVPN. For the setup, this blog post mainly follows this resource.
Setting up stunnel
sudo apt update
sudo apt upgrade
sudo apt install stunnel -y
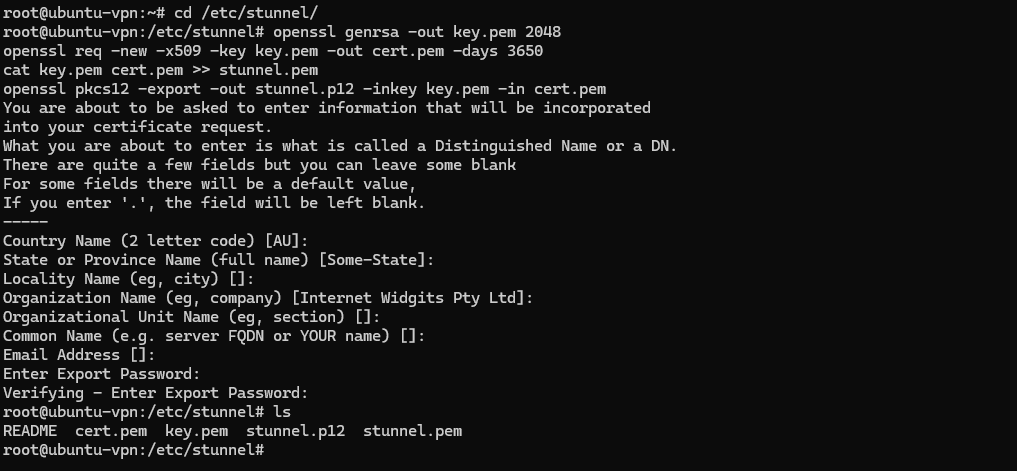
After installing stunnel, we first generate the self-signed SSL certificates which enable us to hide the OpenVPN traffic with TLS encryption. The following commands will be prompted for information about the certificate, such as Country or State, but we will leave them blank for our purpose.
cd /etc/stunnel
openssl genrsa -out key.pem 2048
openssl req -new -x509 -key key.pem -out cert.pem -days 3650
cat key.pem cert.pem >> stunnel.pem
openssl pkcs12 -export -out stunnel.p12 -inkey key.pem -in cert.pem
Fix permissions on the certificate.
chmod 600 /etc/stunnel/stunnel.pem
We further create a directory for stunnel logs.
sudo mkdir -p /var/log/stunnel
sudo touch /var/log/stunnel/stunnel.log
sudo chown stunnel4:stunnel4 /var/log/stunnel/stunnel.log
The main configuration of stunnel is done in /etc/stunnel/stunnel.conf. The important service-level options are defined under [openvpn].
| |
client = no: Stunnel is running in server modeaccept = 443: Stunnel listens on port 443, which is usually allowed through firewallsconnect = 127.0.0.1:1194: Incoming connections to the stunnel port are forwarded to the locally running OpenVPN server on port 1194
After the configuration, we start the stunnel service.
sudo systemctl enable stunnel4
sudo systemctl restart stunnel4
We verify that the stunnel service is running on port 443 on our VPN server.
sudo netstat -tulnp

Setting up OpenVPN
We use the OpenVPN install script to set up the VPN server with the following options.
wget https://git.io/vpn -O openvpn-install.sh
chmod +x openvpn-install.sh
sudo ./openvpn-install.sh
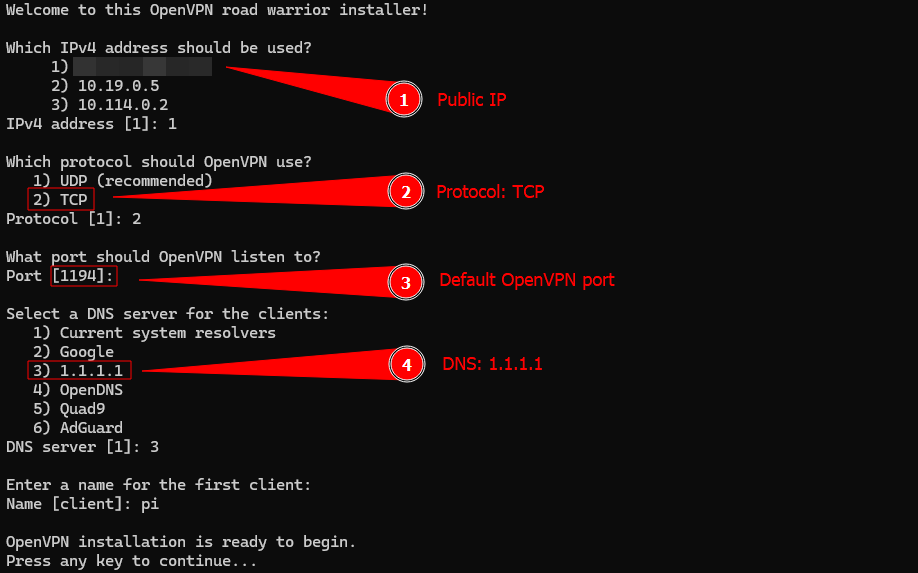
It is important to note that stunnel requires us to use the TCP protocol to work, even though OpenVPN uses UDP by default.
We now change the OpenVPN server configuration to listen on all interfaces by setting the value of local to 0.0.0.0 in /etc/openvpn/server/server.conf, as seen below.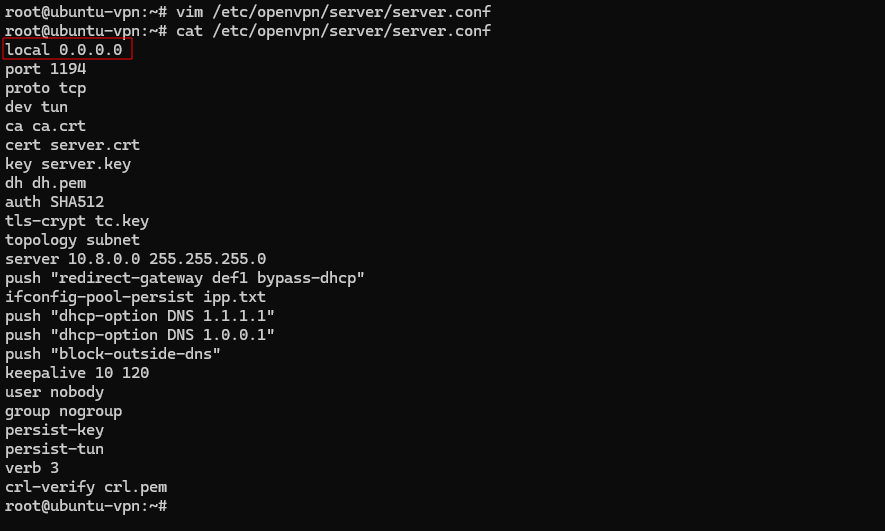
We now start the OpenVPN service as we did with stunnel.
sudo systemctl enable openvpn-server@server.service
sudo systemctl restart openvpn-server@server.service
sudo netstat -tulnp

We are done setting up the VPN server, so the next step is to configure the Dropbox and other VPN clients to be able to communicate with the server.
The Dropbox
Hardware
The following hardware is used:
- Raspberry Pi 4 with Case
- Micro SD card (64GB)
- Power source, e.g. USB-C charger or powerbank
- Ethernet cable to connect to a LAN network
- MK7AC Wi-Fi-Adapter or any other USB Wireless Adapter (optional)
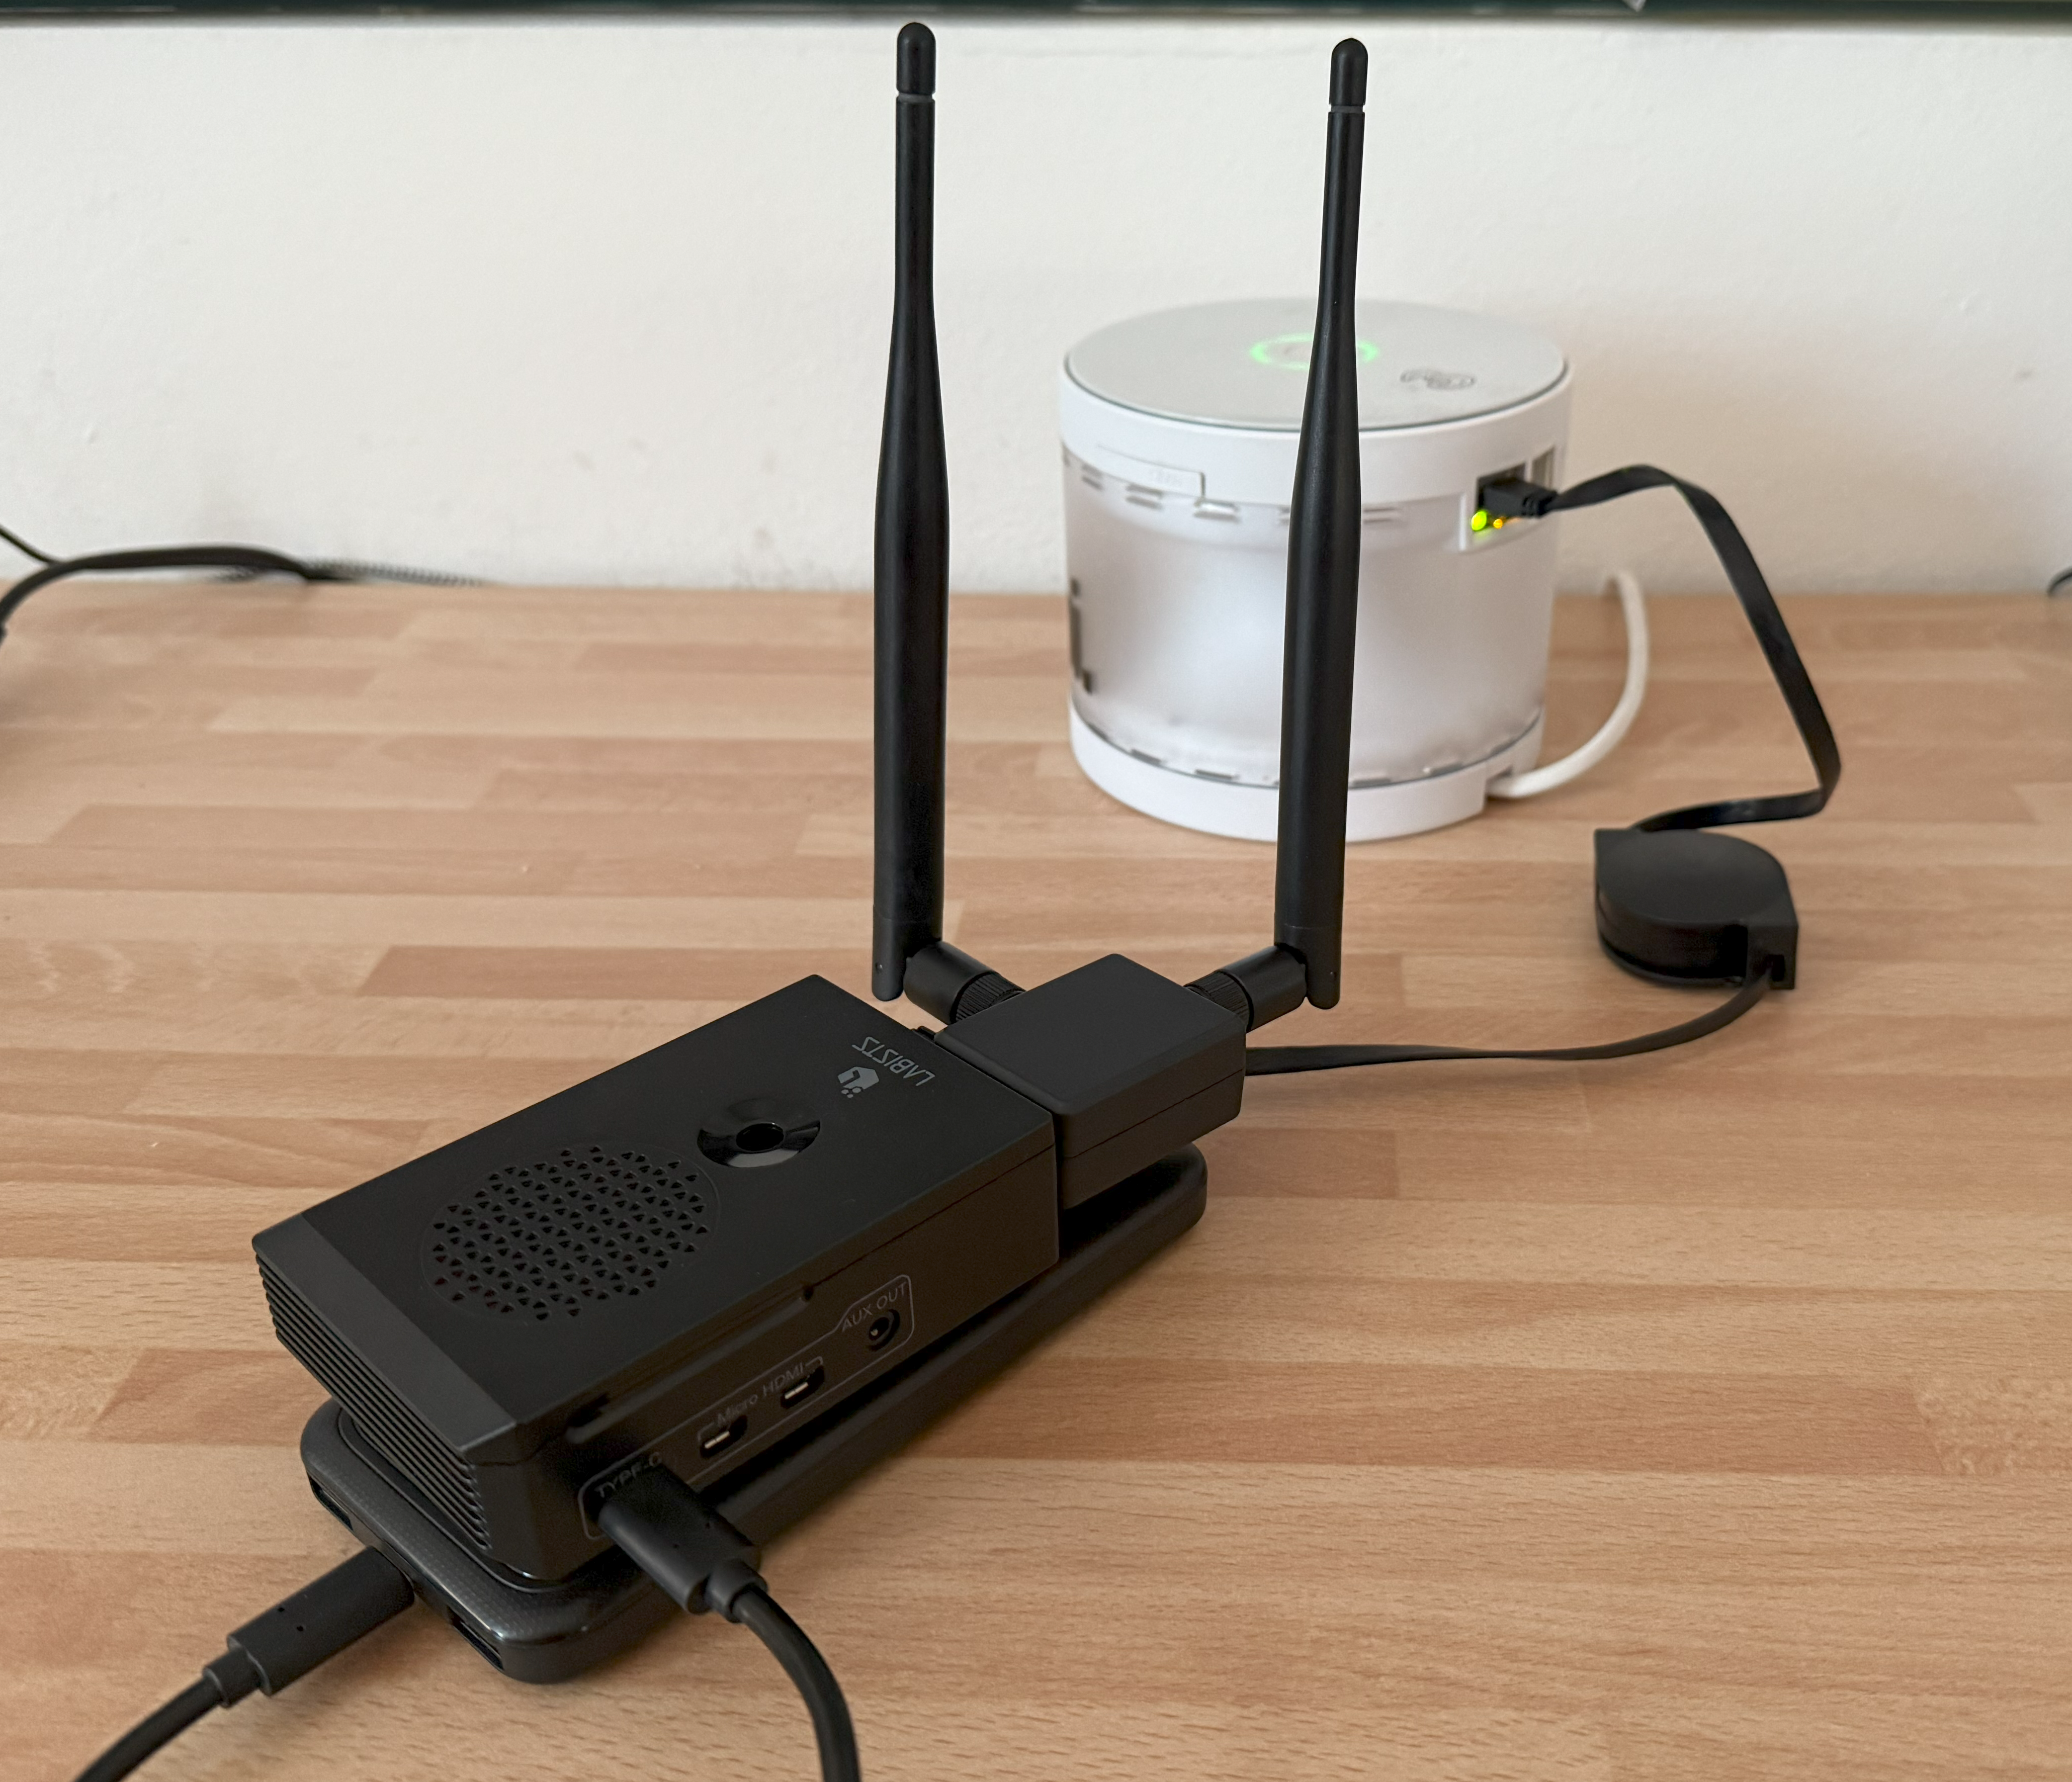
This post will not get into detail on how to install Kali Linux on a Raspberry Pi. In basic steps, the following is necessary for the initial setup:
- Download Kali for Raspberry Pi from https://www.kali.org/get-kali/#kali-arm
- Download Raspberry Pi Imager from https://www.raspberrypi.com/software/
- Install the Kali OS on the Raspberry Pi’s SD card (https://www.themakerlab.io/en/blog/raspberry-pi-headless-setup)
- Connect the Raspberry Pi to a power source and to a Ethernet port (e.g. on a router)
- Connect to the Raspberry Pi via SSH
Setting up the connection
Like on the DigitalOcean droplet, we first install stunnel.
sudo apt update
sudo apt upgrade
sudo apt install stunnel4 -y
We again create the configuration file /etc/stunnel/stunnel.conf, however this time, client is set to yes, as we are working on the dropbox and not on the server.
| |
sudo systemctl enable stunnel4
sudo systemctl start stunnel4
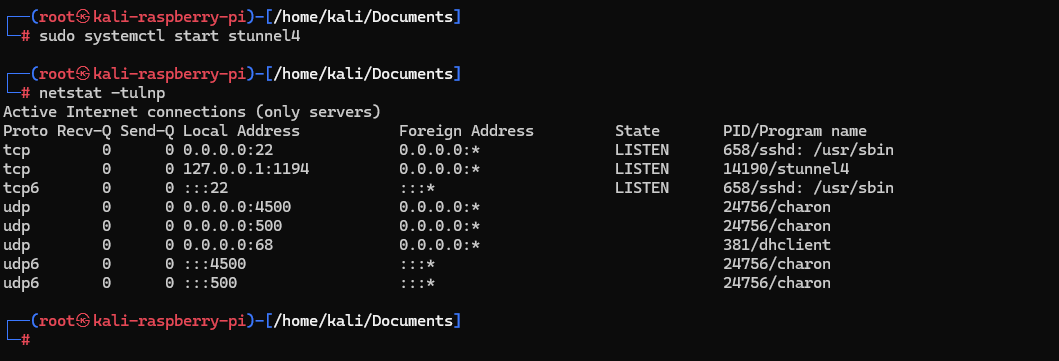
We then take the pi.ovpn file that was generated on the OpenVPN server and modify it to connect to the locally running OpenVPN instance instead. All traffic to this VPN will be forwarded to the droplet on port 443.
The file is saved as /etc/openvpn/openvpn.conf to be executed on system startup.
| |
The added/modified values are:
remote 127.0.0.1 1194pointing to the local address instead of the VPN serverroute-nooullscript-security 2route-up /etc/openvpn/routing.sh
The routing.sh script needs to be created.
| |
sudo chmod +x /etc/openvpn/routing.sh
sudo systemctl enable openvpn
sudo systemctl restart openvpn
sudo systemctl status openvpn
In order to test the configuration, we reboot the Raspberry Pi.
sudo reboot
After the reboot, we find that our Raspberry Pi is connected to the private VPN network and has the IP 10.8.0.2.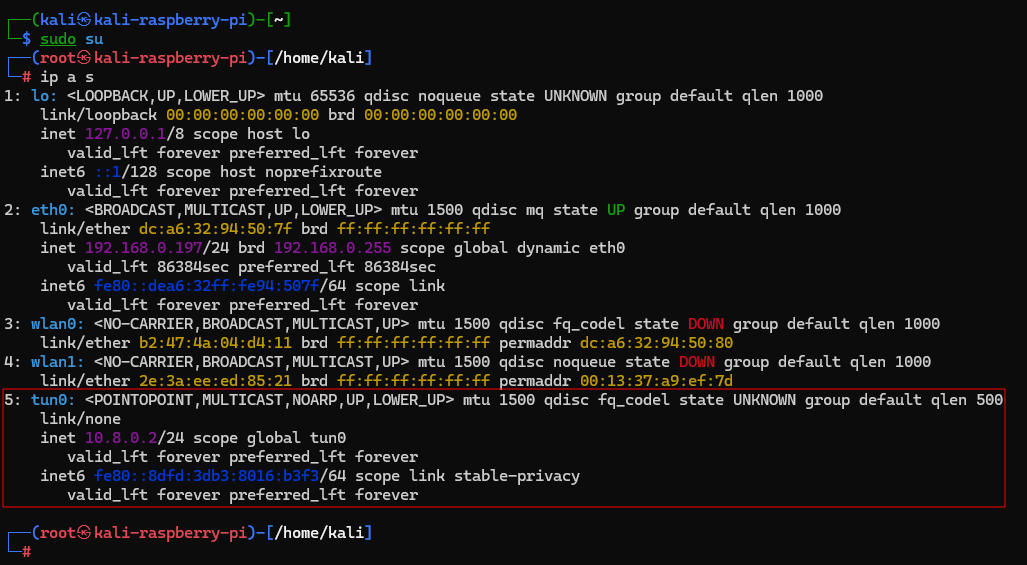
On the server, we create a second VPN client for the attacker machine.
./openvpn-install.sh
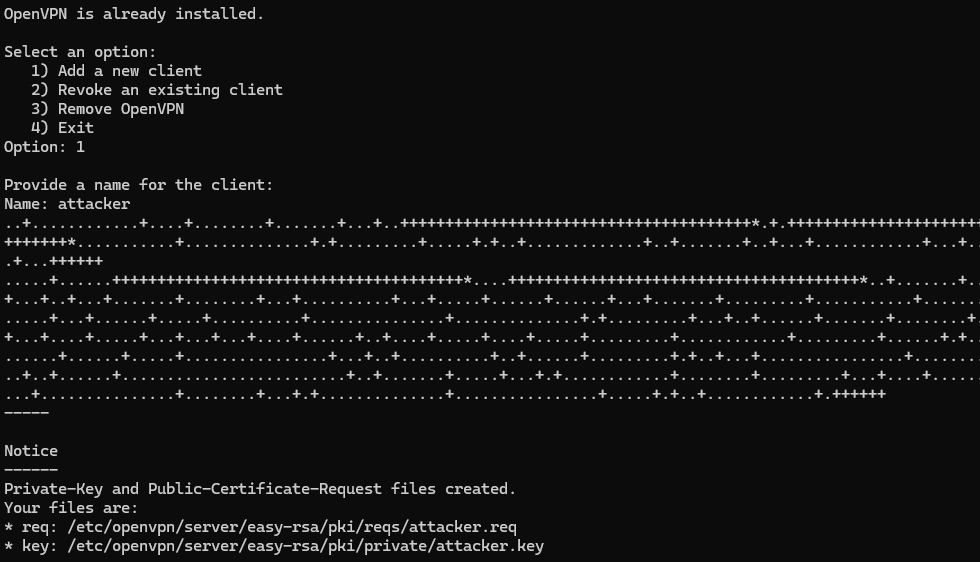
In a Kali virtual machine, we connect to the VPN server. In this case, there is no need for us to install stunnel, since we are in our personal network where we are able to control the firewall rules. Upon being connected, we are assigned a new internal IP address, 10.8.0.3 and are able to communicate with the Raspberry Pi.
sudo openvpn attacker.ovpn

If the Ethernet cable on the Raspberry Pi is disconnected for some reason, the connection will obviously break. However, once the cable is reattached, the dropbox is instantly reconnected to the VPN network and can be accessed via SSH.
Automatic check-in
One goal of mine was to configure the Raspberry Pi to send a check-in request to a server periodically so that during a red team engagement, I can see which dropboxes connected back to me and in which parts of the target network they are located. The simplest way to do that would be to install a webserver on the DigitalOcean droplet where the VPN server is running and have a cronjob send a curl request every few minutes.
Webserver Setup
sudo apt install python3-venv
mkdir -p /var/www/html/app
Create app.py, which has the source code for the application. A
| |
cd /var/www/html/app
python3 -m venv venv
source venv/bin/activate
pip install flask flask-httpauth
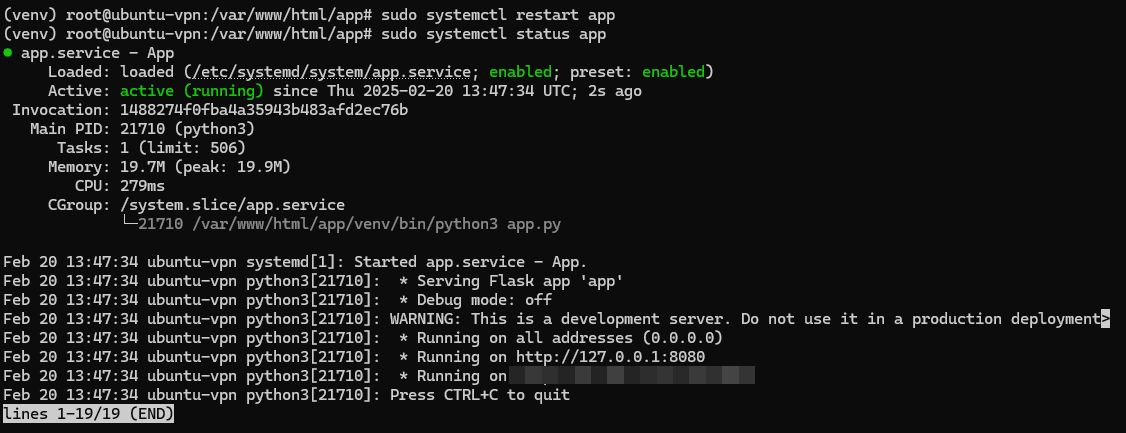
Create a service for the Flask webserver.
vim /etc/systemd/system/app.service
| |
sudo systemctl daemon-reload
sudo systemctl start app
sudo systemctl enable app
Cronjob
On the Raspberry Pi dropbox, after installing the necessary dependencies, we first create a simple bash script that sends the relevant data to the webserver.
sudo apt install jq -y
vim /root/checkin.sh
| |
chmod +x /root/checkin.sh
After making the script executable, we finally create a new cronjob that runs the script every minute.
crontab -e
*/1 * * * * /root/checkin.sh

Now, every minute, the Raspberry Pi sends a POST request with its hostname and network interfaces to the webserver. This allows the operator to see whether or not the OpenVPN connection was successful and which IP address is assigned to the dropbox. The webpage is protected with HTTP Basic Authentication in order to protect sensitive information from unauthorized visitors.
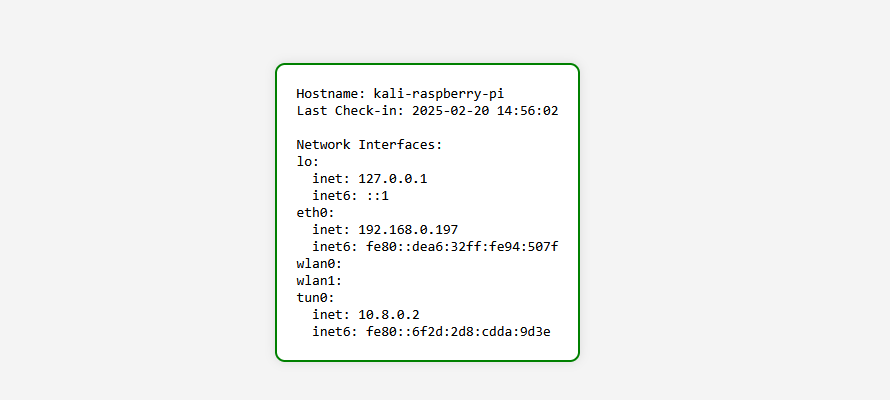
If the Raspberry Pi is offline, meaning that the script could reach the server, the website displays the last check-in with a red border.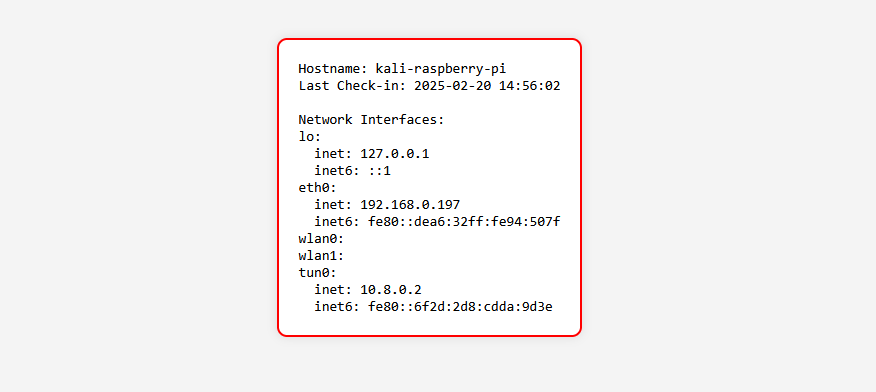
Next Steps
Network Attacks
The main purpose of the dropbox in this blog post is to provide access to a target’s internal network for the purpose of a red team engagement or internal penetration test. Since the dropbox itself is running on the Kali Linux operating system, an operator has plenty of built-in tools available to perform reconnaissance and exploitation techniques in the network. Commonly used are the following:
nmapfor port scanning and service discoverynxcfor checking access with credentials and interacting with certain services (https://www.netexec.wiki/)responderfor performing man-in-the-middle and relaying attacks (https://github.com/lgandx/Responder)impacketfor attacks against Active DirectoryPRETfor gaining information from network printers (https://github.com/RUB-NDS/PRET)
It is further possible to establish a tunnel to the dropbox with tools like ligolo-ng to use tools that are not installed on the device.
Wireless Attacks
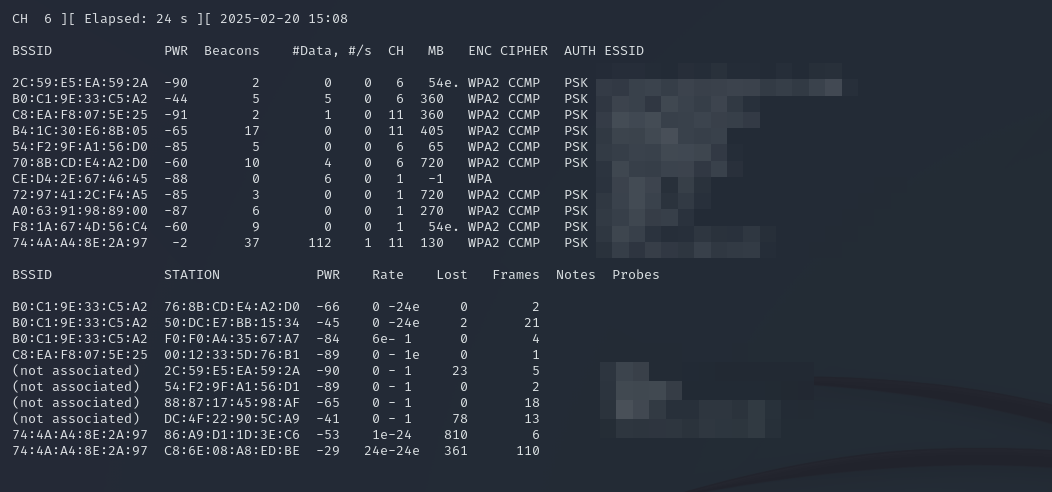
With the Wireless Adaptar taken from the Wi-Fi Pinapple, the dropbox can be used to perform wireless attacks against access points in vicinity. During an engagement, this would be used to capture WPA/WPA2 handshakes, crack the pre-shared key and authenticate to the wireless network. The screenshot below shows the output of the airodump-ng tool from the aircrack-ng suite, which comes with Kali per default.
Improvements
Of course, there are several improvements to be made in this projects to make it more usable and efficient. Since I would probably need more than just one dropbox when doing a red team engagement, the first step would be to create a setup script that automates the installation and configuration of a Raspberry Pi to turn it into a penetration testing dropbox. The webserver would then also need to be overhauled to be able to show and manage multiple dropboxes, with the hostname being the unique identifier.
Additionally, there are plenty of improvements to be made regarding security, including encryption of the check-in requests and exfiltrated data on the Raspberry Pi. For now, I am very happy with this working proof-of-concept, especially since it is easy to build on and contains a lot of functionality that I originally wanted to implement.